You’re new to the world of programming, or you’re just getting used to the hang of things and want to finally put some effort into a really pleasing terminal design and theme. Look no further than iTerm and the zsh shell.

The First Time
I first was exposed to iTerm through my Technical Coaching Fellow (AKA TA) at Flatiron when he pressed CMD twice and a terminal session came sliding down from the top of the screen — I was in awe, in fact, many of us were! I remember spending time installing it and setting some of the settings to a satisfactory level, but all in all it wasn’t that much better than the built-in default terminal on Mac.
The Transition
Then I saw all the amazing themes, customizations and setups people on the web had and knew I had to do it for myself. Especially since my co-workers also have it, and I’m finally working with colleagues in the professional setting where vital information right there in the terminal is very handy.

PSA
I had trouble setting it up and the following may not accurately nor correctly show the best way to get this setup, but it’s what I probably did (eliminating the mistakes and trial and errors) to get my custom setup!
The Process
Step 1
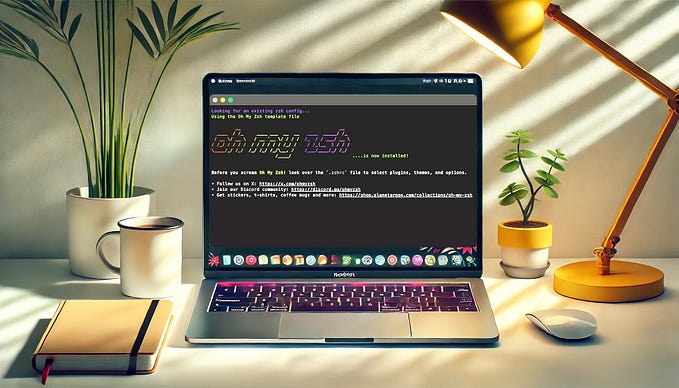
I used steps 1–3 from this blog post. You’ll install iTerm2, a theme, a font, zsh and oh my zsh.
Note: I didn’t have a .zshrc file and had to manually create one myself — refer to Step 3 for more
Step 2
Edit iTerm’s preferences.
iTerm -> PreferencesAppearance
- Show tab bar even when there is only one tab
Profiles
- General → Command: `/bin/zsh`
- Text → check (turn on) Blinking cursor
- Text → Change Font → Vertical → 130%
Keys
- Key Mappings → Load Preset → Natural Text Editing
Step 3
Start off by reviewing the screenshots on this repo to see what some people have as theirs to better understand what you can customize, and what you may want for yourself.
Open up ~/.zshrcin your favorite text editor, or in vim in the terminal with vim ~/.zshrcand if you don’t have anything in yours — or if you don’t have one you can touch ~/.zshrc in the terminal— then you’re where I started off as well.
My theme wasn’t being automatically loaded when opening it up fresh so I added this in source ~/.oh-my-zsh/custom/themes/powerlevel9k/powerlevel9k.zsh-theme .
Chuck these in for good measure too:
export ZSH=/Users/[username]/.oh-my-zsh
export LC_ALL=en_US.UTF-8
export LANG=en_US.UTF-8
If you’re coming from bash then you may want to include this too export PATH=$HOME/bin:/usr/local/bin:$PATH .
If you have any aliases, you can chuck them in as well! I have one for VSCode alias code="open -a /Applications/Visual\ Studio\ Code.app" .
Step 4
I thought the idea of having autocomplete in the terminal would be amazing as it would save typing and time and limit what I needed to remember to a certain degree. Combine that with aliases and you’re golden! And that’s how I got to including the autocomplete plugin. Installation directions.
Then chuck these two lines into your ~/.zshrc file as well:
source ~/.oh-my-zsh/custom/plugins/zsh-autosuggestions/zsh-autosuggestions.zsh
plugins=(zsh-autosuggestions)
Along with that it would be good to have some color for certain syntaxes too!
source /usr/local/share/zsh-syntax-highlighting/zsh-syntax-highlighting.zsh
Step 5
The following are just my custom settings for the theme and setup I desired which go into the almighty ~/.zshrc file:
ZSH_THEME="powerlevel9k/powerlevel9k"
POWERLEVEL9K_CONTEXT_TEMPLATE='%n'POWERLEVEL9K_LEFT_PROMPT_ELEMENTS=(time context dir vcs)
POWERLEVEL9K_RIGHT_PROMPT_ELEMENTS=(status ip ram battery)POWERLEVEL9K_STATUS_VERBOSE=false
POWERLEVEL9K_SHORTEN_STRATEGY="truncate_middle"
POWERLEVEL9K_SHORTEN_DIR_LENGTH=3
POWERLEVEL9K_PROMPT_ON_NEWLINE=true# Visual customisation of the second prompt line
local user_symbol="❤️"
if [[ $(print -P "%#") =~ "#" ]]; then
user_symbol = "#"
fi
POWERLEVEL9K_MULTILINE_LAST_PROMPT_PREFIX="%{%B%F{black}%K{yellow}%} %{%b%f%k%F{yellow}%} %{%f%} %F{red}$user_symbol "POWERLEVEL9K_VCS_MODIFIED_BACKGROUND='red'
COMPLETION_WAITING_DOTS="true"
DISABLE_AUTO_UPDATE="true"
CASE_SENSITIVE="true"POWERLEVEL9K_BATTERY_VERBOSE=true
POWERLEVEL9K_BATTERY_LEVEL_BACKGROUND=(darkred orange4 yellow4 yellow4 chartreuse3 green3 green4 darkgreen)# changing the tab colors
echo -e "\033]6;1;bg;red;brightness;18\a"
echo -e "\033]6;1;bg;green;brightness;26\a"
echo -e "\033]6;1;bg;blue;brightness;33\a"
You can find more examples here as well. And this is helpful for understanding what can be customized and how to go about doing so.